
Spotify Playlist of the Week: Weekend Barbeque Mix
May 28, 2017
Spotify Playlist of the Week: Car Ride Soundtracks
June 4, 2017
Hello all! It is June 1st tomorrow, already! With school letting out and summer being right around the corner, we’ve created a list of 7 AWESOME (and maybe messy) DIY crafts for you and your kiddos to do during your time off. Most of these activities require little to no expense and are perfect for getting a bit of sunshine outdoors. We’ve included ingredient lists and step-by-step instructions for each project. We’ve also provided the direct link to the original activity for more details. Happy crafting! Oh, and don’t forget to let us know how it goes!
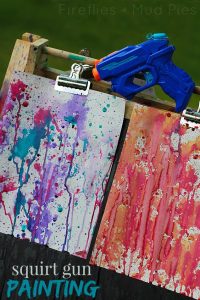
1. SQUIRT GUN PAINTING || via Fireflies + Mud Pies
WHAT YOU NEED:
squirt guns
thumbtacks
paper
WHAT TO DO:
1. Find a spot in the backyard to pin up a couple of pieces of paper. This could be an easel, this could be a tree,…any place that you aren’t afraid of getting too messy.
2. Take out your liquid watercolors. Pick a color and pour into a bowl. Next, add water and mix. Diluting the paint with water will make it last longer!
3. Grab your squirt guns and pour diluted watercolors into the chamber.
4. Squirt away! (Tip: kids may want to squirt each other, so watch out!)
 2. BUBBLE WRAP PAINTING || via Artbar
WHAT YOU NEED:
rollers
bubble wrap
washable kid’s paint
paint trays or paper plates
butcher paper or wax paper
WHAT TO DO:
1. Cut a piece of bubble wrap to fit around the roller. Secure and tape in place.
2. Cover your table or other surface with butcher paper.
3. Pour paint into paint trays or paper plates.
4. Roll the rollers in the paint and make masterpieces on paper!
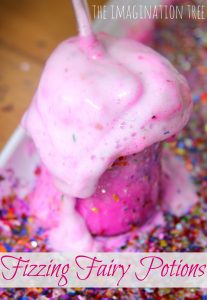 3. FIZZY FAIRY POTIONS || via The Imagination Tree
WHAT YOU NEED:
baking soda
white distilled vinegar
dish soap
food coloring (or powder paint)
glitter
small glass jar
spoon
a tray or large dish to contain the overflow (could also use a plastic storage container)
WHAT TO DO:
1. First, fill the jar half way with vinegar.
2. Stir in a spoonful of your chosen food coloring.
3. Next, add a big squeeze of dish soap and a liberal helping of glitter.
4. Add in a spoonful of baking soda and start to stir with the spoon.
5. The potion will bubble and froth, fizzing out over the jar and making a gorgeous, sparkly mixture!
6. There’s no need to wash it out to start again, just keep adding more baking soda, dish soap, and vinegar and stir it up! You can change colours during the experiment by simply adding them over the top.
7. And don’t forget to keep on sprinkling that glitter for lots of magic!
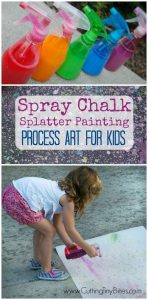 4. SPRAY CHALK SPLATTER PAINTING || via Paper and Glue
WHAT YOU NEED:
spray bottles
small funnel
cornstarch
water
food coloring
butcher paper (if you want to keep the masterpiece!)
WHAT TO DO:
1. Add approximately 1/3 cup of cornstarch to the bottles using the funnel.
2. Fill up the remainder of the bottle with water.
3. Add a generous squirt of food coloring. (neon colors are brightest, but regular colors work great, too…you can experiment with how much food coloring you need to add to get bright enough colors.
4. Swirl and shake the bottles until the cornstarch is integrated.
5. Shake periodically throughout chalking to avoid settling.
6. Make sure to clean bottles thoroughly to prevent mold.
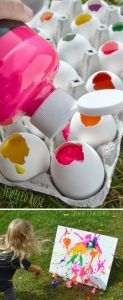 5. PAINT FILLED EGGS || via Growing a Jeweled Rose
WHAT YOU NEED:
eggshells
washable kid’s paint
tissue paper or plastic wrap
glue stick
canvas, poster board, butcher paper, etc…
WHAT TO DO:
1. Save shells as you eat eggs. All you have to do is use a butter knife to gently crack the top of the shells, making a hole big enough for the egg to pass through. Then, give the eggshells a quick rinse with hot water and anti-bacterial soap and place them back into the carton to dry.
2. Fill the eggshell with paint. (roughly 3/4 full)
3. Once filled you will want to seal them using tissue paper and glue. Simply use a glue stick to cover one side of a tissue paper square, and then gently stick that over each egg opening.
4. Toss at your canvas!
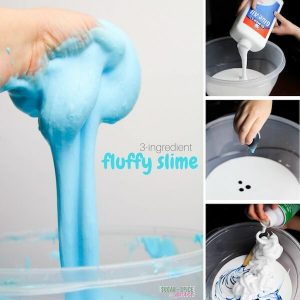 6. FLUFFY SLIME || via Sugar Spice and Glitter
WHAT YOU NEED:
1 cup white school glue
3 cups shaving cream
5+ tablespoons contact lens solution (this will need to be adjusted based on your slime – things like humidity and type of shaving cream will mean you need more or less)
food coloring (optional)
WHAT TO DO:
1. Empty your glue into a large bowl. Add glitter or food dye as desired and stir it in.
2. Start adding in the shaving cream. Keep adding until you don’t feel like there is any “just glue” left. It will continue to get thick and puffy.
3. Slowly add in the contact solution. The contact solution serves as your “slime activator.”
4. Keep stirring everything with your spatula and adjust as needed for desired texture.
5. Once the slime is cohesive, no longer sticky or appearing to have any liquid in the mixture, start kneading the slime – this is going to help it be less sticky.
6. Knead the slime for at least 3 minutes before adding any more ingredients to adjust.
7. When the slime has been thoroughly kneaded and adjusted, give it to the kids in a clean, wide-open area that you don’t mind getting a little messy.
8. You can package in a ziplock bag for keeping.
9. Enjoy!
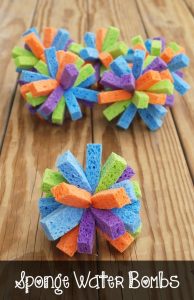 7. SPONGE WATER BOMBS || via Endlessly Inspired
WHAT YOU NEED:
kitchen sponges (1 water bomb = 4 sponges)
rubber bands
scissors
WHAT TO DO:
1. Cut the sponges lengthwise into thirds or fourths. (I ended up using 12 pieces for each sponge, which made them nice and full.)
2. Stack up 12 pieces (4×3).
3. Pinch the center together and wrapped a rubber band as tightly as you can around the middle.
4. Toss them in a bucket of water and go wild!
Lacey Reimnitz | Toneworks Music Therapy Intern
